Showing posts with label Small Space Decor. Show all posts

Thursday, 25 August 2011

My Bedroom Inspiration

Good Morning!

Today I thought I'd show you two spaces that have really inspired the plans for my new bedroom (5 days till move in day -- Yay!).

1. I have a huge crush on this NYC bedroom from Elle Decor, and especially the crisp white sheets paired with the printed burgundy throw. I love how the bones of the room are all in neutral colours (black, white, woods) but the accent pieces keep it looking vibrant and full of texture.


2. Once again I am crazy about the bedding in this room from Chatelaine magazine. I love the layers of printed textiles, the unusual shapes of the decor and the pops of gold.

Chatelaine
I can't wait to post pictures of my new room once it's done!


Sunday, 21 August 2011

5 Lovely Things

  1. Beautiful Eduardo Recife prints. Worth clicking the link to see more:
Eduardo Recife
2. These fancified ice cubes are an easy way to liven up a glass of water:
Martha Stewart
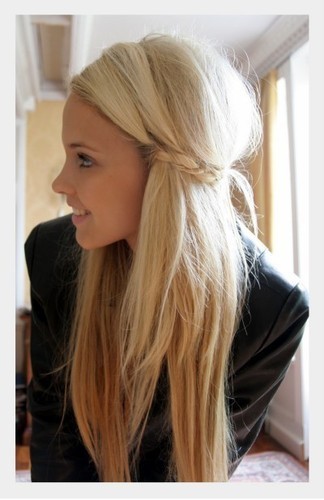
3. Just tease and braid for this pretty hair idea:
musingsinfemininity
4. Multi-purpose wordsearch cards, how cool! Just circle the words that apply:
coolmaterial

5. Newsprint nails! Click on the link for the surprisingly easy tutorial:
Passion Nail Art

Thursday, 18 August 2011

Decorating with Tape

Maybe you're a commitment-phobe when it comes to decorating your apartment. Maybe you live in a dorm or rental where you aren't allowed to paint, or put nails in the wall. Whatever the case, I have the solution: creating big statement wall art using tape! Here is some inspiration:

1. Faux Paneling: For those who dream of crown moulding and embellished architectural features, here's something to tide you over for now.
Dabble Mag
 
2. Portrait: Granted, it might take a bit of skill to create this super cool pop art look, but for the artistically gifted among you, why not give it a shot!

3. Fluorescent Shapes: Go graphic with this bright and bold optical illusion idea. 

4. Crane: No need to stick to a flat surface! This tape crane brings the wow factor with big contrast and dimension.

Happy Wednesday!

Saturday, 13 August 2011

Treasures from my Grandparents' House

My Grandparents are selling their house and a lot of their things have ended up with my family. Here are some photographs I took of a few things that I thought were interesting.


Friday, 12 August 2011

Two Small Parisian Apartments

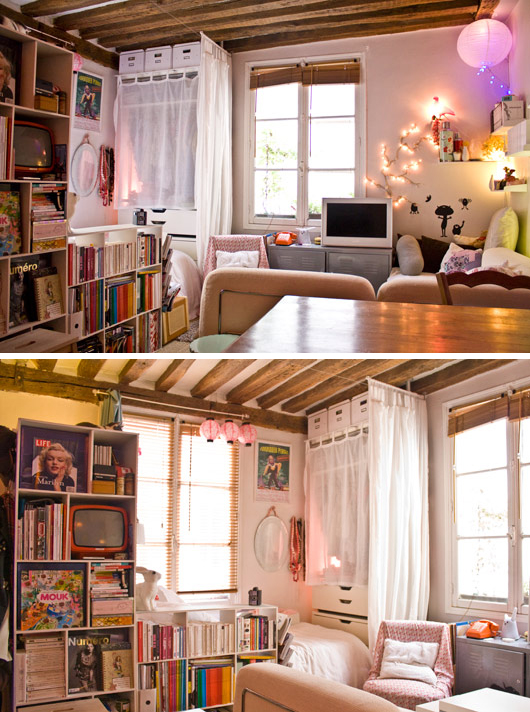
Check out these two very different and very lovely small Parisian Apartments.

First up, this calming and classic space from A La Parisienne. I absolutely love it! The colour scheme reminds me of roses and chocolate and cream. So dreamy.

The second apartment found via decor8 is more cluttered and modern, but still full of beautiful feminine design elements. I love how the bed becomes a cozy nook by putting the bookshelves in front of them.

Tuesday, 9 August 2011

Framed! Easy Decorating Ideas Using Empty Picture Frames


      It is my belief that picture frames are a neglected species in the student world, with many undergrads opting for sticky tack or double sided tape as their primary wall art display method. Mostly it's because we generally don't have the time or money to size up our photos and posters, buy the necessary materials, or bring it into a shop to get it done. But I say it's time to bring this elusive decorating item back into university housing!  I present to you 6 creative ways to use those old empty frames that most people seem to have lying around somewhere--without putting too much effort into it!

1. Running on Empty: Just put them up as is! For a high contrast and geometric look, paint them white if it's a brightly coloured wall, or black for a pale coloured wall. And embrace the assymetry!
source
   2. Inspire with the Wire: I love the idea of crisscrossing wire through a frame as a way of making an inspiration board. A great way of dealing with all that pretty paper clutter you don't want to get rid of!

source
3. Objectified: This is just the coolest thing. Framed objects! Oh how I long for a built in flower vase, but I'd settle for a framed key hook.

source
4. All the Pretty Lights: Here's a way to make fairy lights look a little more put together. Just wrap them around an empty frame for wall art that deserves to be in the spotlight!

source
 5. Branch Out: What an interesting and creative way to bring some nature and texture into your space! Head over to Cleverly Inspired for more awesome ideas like this one.
source
 
6. All that Glitters: Think your jewellery deserves a better home than the tangled bowl on your dresser? Get easy access and aestethic appeal by using frames to display it on your wall!

source
7. 'Tray' Chic: Last but not least, check out this lovely decorative tray made out of an old frame.I envision it atop a coffee table, or you could even add handles for a classy way to serve up some refreshments!

source

Over and out!


Saturday, 6 August 2011

DIY: Hanging Framed Poetry


 After finding a couple of empty white frames (I think they actually might have something to do with curtains but anyway) I knew that I wanted to make something with them. And then I found a really old poetry textbook that used to belonged to my Mom. That's when I came up with idea for framed poems.They're really easy to make and I think they are a pretty cool alternative to the posters and magazine clippings you so often see in student housing decor.

I started by looking through the book and picking out my favourite poems. I chose 'Golden Slumbers' by Thomas Dekker, 'Sonnet 116' by Shakespeare, and 'I Love All Beauteous Things' by Robert Bridges.


 I carefully cut out the pages I needed. If you don't have a book, you can just as easily print poems you like from the internet. Or maybe you'd rather use a script of your favourite film, or a picture book from your childhood that you never look at but don't want to throw out.  

Next, since I wasn't using real picture frames, I taped the poems to the back of the frames. I trimmed the edges to make sure you couldn't see anything sticking out in the front view.
I recycled some black ribbon from a gift bag, and made them into little bows. I cut the thicker polka-dot ribbon down the middle to make the hanger (or whatever you call it!).

Using a hot glue gun, I glued the bow to the polkadot ribbon, and attached it to the back of my frames with tape. Finally, I used some of the leftover ribbon to cover the heads of three push pins, which I then used to attach the poems to the wall. 


 And there you have it! An easy little DIY project made completely out of bits and bobs I found around the house.  I'm excited to put them up in my new apartment!

Before and After: My First Furniture Makeover!

This September, I'm entering my second year of university and will be moving into my very first apartment. I am endlessly excited about the prospect of decorating and designing this new space which I'll be sharing with my sister. After living in dorms for the past 5 years (boarding school kid) I can't wait to be able to choose my own furniture and FINALLY escape the beige walls. I was really inspired by the blog 'Paint Me White' (Check it out--everything is so beautiful!) and decided to undertake some white painting of my own. It's such a great solution to the age old student problem of mismatched hand-me-down furniture.

Before: My Dad's old chest that was sitting unused in our basement.


Process: I got started by sanding down the wood, and then wiping it clean with a wet cloth. I added four coats of Behr Premium Plus Paint & Primer in one, and then spray painted the drawer pulls black. 

After:   The result of my very first DIY project! I put together a little vignette for the photograph, but I think I'll end up using it as a vanity table once I move into my new room. 


I love how you can really see the ornate carving details in the lighter colour.

I am so happy with the results, and can't wait to do more!